Hello World requires the following steps
1. JDK 5 or above (JRE alone is not sufficient) installation
2. Eclipse Ganymede or above installation
5. Android Emulator – Android Virtual Device (AVD) Creation
6. New Android Project Creation
7. Create Hello World Android source
8. Run Hello World
A word of caution. If you are going to do this Hello World Android from your office computer, get necessary permissions from your manager. Since, you may be behind some proxy/firewall the software update sites might be blocked. You may get frustrated setting up the IDE.
If you are a java guy, you should be already having some JDK installed in your computer. Just check the version for compatibility. If you have a older version of Eclipse, download the latest version. No harm in having multiple Eclipse versions. Android SDK and plugin installation, just follow the instructions given the URL I have given above. They are more than sufficient.
After you install the ADT plugin, restart the eclipse. Then in Eclipse, Window -> Preferences (in left panel select Android) then give your SDK installed location in the right side panel.
Android Emulator
If you have an android mobile and you want to execute your Hello World in that, there is a time for it. First master yourselves with the basics and you can use the Android Emulator. Always try first with the emulator before going to the real mobile. It will save you lot of time.

Click the android icon (with a white down arrow) from the Eclipse toolbar. I have show that icon in the below image. Then click the ‘New’ button and create a AVD. Finally it should look like the window in my image.
Hello World Project Creation
Right click in your Eclipse’s Package Explorer and New -> Android Project. Give a project name, then select the Build Target. The build target should match the api version you have given at the time of AVD creation. Then fill the properties panel also.

Now the HelloWorld android project is ready to use. Open the HelloWorld.java from the project source. You should have a HelloWorld class source code similar to the below.
package com.javapapers.android; | |
import android.app.Activity; | |
import android.os.Bundle; | |
public class HelloWorld extends Activity { | |
/** Called when the activity is first created. */ | |
@Override | |
public void onCreate(Bundle savedInstanceState) { | |
super.onCreate(savedInstanceState); | |
setContentView(R.layout.main); | |
} | |
} |
Notice that you don’t have a main method. It is not needed. This HelloWorld is based on the Activity class and onCreatemethod will be called on initiation.
Now lets add our HelloWorld part to it. Edit the code and add the following snipped to it. Import TextView also.
TextView tv = new TextView(this); | |
tv.setText("Hello World!"); | |
then set the contentView to the TextView you have created
setContentView(tv); |
Now your Android Hello World should look like
package com.javapapers.android; | |
import android.app.Activity; | |
import android.os.Bundle; | |
import android.widget.TextView; | |
public class HelloWorld extends Activity { | |
/** Called when the activity is first created. */ | |
@Override | |
public void onCreate(Bundle savedInstanceState) { | |
super.onCreate(savedInstanceState); | |
TextView tv = new TextView(this); | |
tv.setText("Hello World!"); | |
setContentView(R.layout.main); | |
} | |
} | |
Run your Android Hello World
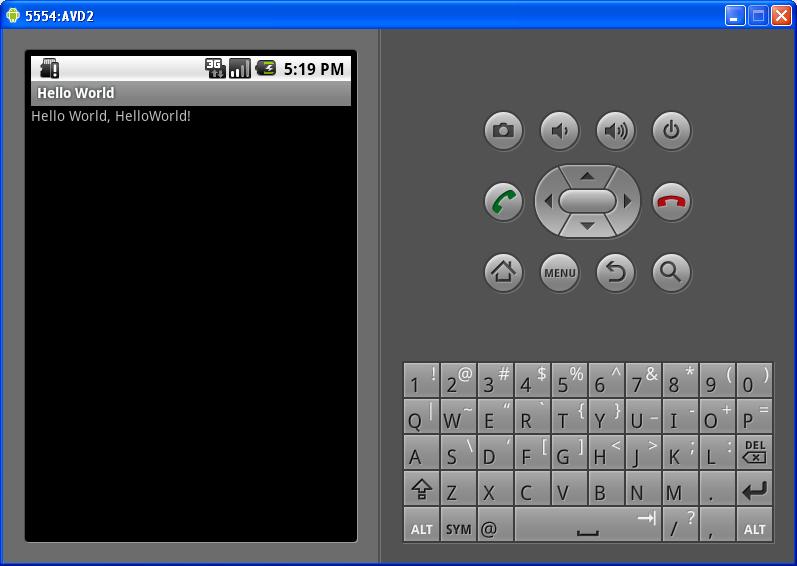
Right click on the project ‘Run As -> Android Application’
The AVD (emulator) will get started and it will take a while to respond. AVD needs that time to initialize itself. Wait for 2 to 3 minutes. Keep an eye on the console, it will give you some background process status information. Then you see “Hello World!”.
The AVD (emulator) will get started and it will take a while to respond. AVD needs that time to initialize itself. Wait for 2 to 3 minutes. Keep an eye on the console, it will give you some background process status information. Then you see “Hello World!”.
