Waiting for Android New Version Jelly Beans(5.0) and its features by this year last.
Tuesday, March 13, 2012
Friday, March 9, 2012
Displaying Chart On Android
Displaying Chart On Android
In this tutorial, we are going to learn, how to display chart or bar graphs on android for your statistical data.
To begin with the tutorial, lets create new project.
FILE–>NEW–>Android Project

Now right click on the project in Package explorer and go to Properties.
Properties–>Java Build Path–>Libraries–>Add external JARs..

Once your API is linked, you are ready now for coding your program. Here is the link where from you can download the API http://www.kidroid.com/kichart/
Now lets code the program. This is the complete code of android chart sample.
package com.google.android.chartView;
import com.kidroid.kichart.model.Aitem;
import com.kidroid.kichart.view.LineView;
import android.app.Activity;
import android.graphics.Color;
import android.os.Bundle;
public class chartView extends Activity {
/** Called when the activity is first created. */
LineView lv;
@Override
public void onCreate(Bundle savedInstanceState) {
super.onCreate(savedInstanceState);
setContentView(R.layout.main);
String xaxis[]=new String[4];
xaxis[0]=”2006″;
xaxis[1]=”2007″;
xaxis[2]=”2008″;
xaxis[3]=”2009″;
float line1[]=new float[4];
line1[0]=120;
line1[1]=240;
line1[2]=500;
line1[3]=100;
float line2[]=new float[4];
line2[0]=100;
line2[1]=650;
line2[2]=700;
line2[3]=300;
float line3[]=new float[4];
line3[0]=50;
line3[1]=180;
line3[2]=360;
line3[3]=900;
Aitem items[]=new Aitem[3];
items[0]= new Aitem(Color.BLUE,”pauOut”,line1);
items[1]= new Aitem(Color.GREEN,”pauOut”,line2);
items[2]= new Aitem(Color.YELLOW,”pauOut”,line3);
lv=new LineView(this);
lv.setTitle(“Yearly Budget”);
lv.setAxisValueX(xaxis);
lv.setItems(items);
setContentView(lv);
}
}
here is the final view of the chart module. After this demo, you should get stuff like this.

Monday, March 5, 2012
How to resize Android Emulator if it is too big?
Issue:
Android Emulator is too big and unable to see options available in the bottom
Solution:
1. Launch Eclipse. I hope, it must have launched already.
2. Choose your project. Click on "Run" menu and choose "Run Configurations".
3. Choose your project from left window Android application section.
4. Choose "Target" tab from right side window.
5. There will be a option called "Additional Emulator Command Line Options" in the bottom of "Emulator Launch parameters".
[NOTE: If you are NOT able to see this option, it must be hidden there, you can drag Run Configurations window little more and make it big in the bottom. You will see this option. ]
6. Add "-scale 0.8" this value without quote, in that "Emulator Launch parameters" field.
7. Click on "Apply"
Then, you can simply run your project as usual, the newly resized emulator will be launched. This is permanent solution for who are facing this issue.
Good luck guys!
Cheers!
Thursday, March 1, 2012
SQLite in Android
This is a sample program which shows usage of SQLite in android application for saving data. This application has two buttons in the main menu one for saving information and another for showing all saved information.
Basic description of algorithm in step by step form:
1.) Create a Project DatabaseSample.
2.) Replace the following code with res/layout/main.xml :
<?xml version="1.0" encoding="utf-8"?>
<RelativeLayout android:layout_width="fill_parent" android:layout_height="fill_parent" xmlns:android="http://schemas.android.com/apk/res/android" >
<TextView android:id="@+id/text" android:layout_height="wrap_content" android:layout_width="wrap_content" android:text="DataBase Sample App" android:textSize="24.5sp" android:layout_gravity="center"/>
<Button android:layout_below="@id/text" android:text="Save Data" android:id="@+id/button1" android:layout_gravity="center" android:layout_width="wrap_content" android:layout_height="wrap_content" android:layout_marginLeft="50dp" android:layout_marginTop="50dp">
</Button>
<Button android:layout_below="@id/button1" android:text="Check Data" android:id="@+id/button2" android:layout_gravity="center" android:layout_width="wrap_content" android:layout_height="wrap_content" android:layout_marginLeft="50dp">
</Button>
</RelativeLayout>
3.) Create a helper class DataManipulator.java that can create the database and encapsulate other SQL details. In this DataManipulator class we will include an important inner class OpenHelper that provides a SQLiteOpenHelper.
package com.app.DatabaseSample;
import android.content.Context;
import android.database.Cursor;
import android.database.sqlite.SQLiteDatabase;
import android.database.sqlite.SQLiteOpenHelper;
import android.database.sqlite.SQLiteStatement;
import java.util.ArrayList;
import java.util.List;
public class DataManipulator
{
private static final String DATABASE_NAME = "mydatabase.db";
private static final int DATABASE_VERSION = 1;
static final String TABLE_NAME = "newtable";
private static Context context;
static SQLiteDatabase db;
private SQLiteStatement insertStmt;
private static final String INSERT = "insert into " + TABLE_NAME + " (name,number,skypeId,address) values (?,?,?,?)";
public DataManipulator(Context context) {
DataManipulator.context = context;
OpenHelper openHelper = new OpenHelper(DataManipulator.context);
DataManipulator.db = openHelper.getWritableDatabase();
this.insertStmt = DataManipulator.db.compileStatement(INSERT);
}
public long insert(String name,String number,String skypeId,String address) {
this.insertStmt.bindString(1, name);
this.insertStmt.bindString(2, number);
this.insertStmt.bindString(3, skypeId);
this.insertStmt.bindString(4, address);
return this.insertStmt.executeInsert();
}
public void deleteAll() {
db.delete(TABLE_NAME, null, null);
}
public List<String[]> selectAll()
{
List<String[]> list = new ArrayList<String[]>();
Cursor cursor = db.query(TABLE_NAME, new String[] { "id","name","number","skypeId","address" }, null, null, null, null, "name asc");
int x=0;
if (cursor.moveToFirst()) {
do {
String[] b1=new String[]{cursor.getString(0),cursor.getString(1),cursor.getString(2),
cursor.getString(3),cursor.getString(4)};
list.add(b1);
x=x+1;
} while (cursor.moveToNext());
}
if (cursor != null && !cursor.isClosed()) {
cursor.close();
}
cursor.close();
return list;
}
public void delete(int rowId) {
db.delete(TABLE_NAME, null, null);
}
private static class OpenHelper extends SQLiteOpenHelper {
OpenHelper(Context context) {
super(context, DATABASE_NAME, null, DATABASE_VERSION);
}
@Override
public void onCreate(SQLiteDatabase db) {
db.execSQL("CREATE TABLE " + TABLE_NAME + " (id INTEGER PRIMARY KEY, name TEXT, number TEXT, skypeId TEXT, address TEXT)");
}
@Override
public void onUpgrade(SQLiteDatabase db, int oldVersion, int newVersion)
{
db.execSQL("DROP TABLE IF EXISTS " + TABLE_NAME);
onCreate(db);
}
}
}
4.) Create a save.xml in res/layout/save.xml:
<?xml version="1.0" encoding="UTF-8"?>
<LinearLayout xmlns:android="http://schemas.android.com/apk/res/android" android:id="@+id/LinearLayout01" android:orientation="vertical" android:layout_width="wrap_content" android:layout_height="wrap_content" android:paddingLeft="20sp">
<TextView android:id="@+id/button1_label" android:layout_height="fill_parent" android:layout_width="wrap_content" android:text="Fill Information" android:textSize="24.5sp" android:layout_gravity="center" android:layout_marginBottom="25dip" />
<TextView android:layout_width="fill_parent" android:layout_height="wrap_content" android:text="Name:" android:layout_gravity="center" android:textSize="14.5sp" />
<EditText android:id="@+id/name" android:layout_width="fill_parent" android:layout_height="wrap_content" />
<TextView android:layout_width="fill_parent" android:layout_height="wrap_content" android:text="Telephone Number:" android:layout_gravity="center" android:textSize="14.5sp" />
<EditText android:id="@+id/number" android:layout_width="fill_parent" android:layout_height="wrap_content" />
<TextView android:layout_width="fill_parent" android:layout_height="wrap_content" android:text="Skype ID:" android:layout_gravity="center" android:textSize="14.5sp" />
<EditText android:id="@+id/skypeId" android:layout_width="fill_parent" android:layout_height="wrap_content" />
<TextView android:layout_width="fill_parent" android:layout_height="wrap_content" android:text="Address:" android:layout_gravity="center" android:textSize="14.5sp" />
<EditText android:id="@+id/address" android:layout_width="fill_parent" android:layout_height="wrap_content" />
<LinearLayout android:id="@+id/LinearLayout02" android:orientation="horizontal" android:layout_width="wrap_content" android:layout_height="wrap_content" android:paddingLeft="20sp">
<Button android:text="Save" android:id="@+id/Button01add" android:layout_width="wrap_content" android:layout_height="wrap_content" android:layout_marginTop="20sp" android:layout_marginLeft="20sp">
</Button>
<Button android:text="Back" android:id="@+id/Button01home" android:layout_width="wrap_content" android:layout_height="wrap_content" android:layout_marginTop="20sp" android:layout_marginLeft="20sp">
</Button>
</LinearLayout>
</LinearLayout>
5.) Create a Activity SaveData.java to Save the information :
package com.app.DatabaseSample;
import android.app.Activity;
import android.view.View;
import android.view.View.OnClickListener;
import android.app.AlertDialog;
import android.app.Dialog;
import android.content.DialogInterface;
import android.content.Intent;
import android.os.Bundle;
import android.widget.EditText;
import android.widget.TextView;
public class SaveData extends Activity implements OnClickListener {
private DataManipulator dh;
static final int DIALOG_ID = 0;
protected void onCreate(Bundle savedInstanceState){
super.onCreate(savedInstanceState);
setContentView(R.layout.save);
View add = findViewById(R.id.Button01add);
add.setOnClickListener(this);
View home = findViewById(R.id.Button01home);
home.setOnClickListener(this);
}
public void onClick(View v){
switch(v.getId()){
case R.id.Button01home:
Intent i = new Intent(this, DatabaseSample.class);
startActivity(i);
break;
case R.id.Button01add:
View editText1 = (EditText) findViewById(R.id.name);
View editText2 = (EditText) findViewById(R.id.number);
View editText3 = (EditText) findViewById(R.id.skypeId);
View editText4 = (EditText) findViewById(R.id.address);
String myEditText1=((TextView) editText1).getText().toString();
String myEditText2=((TextView) editText2).getText().toString();
String myEditText3=((TextView) editText3).getText().toString();
String myEditText4=((TextView) editText4).getText().toString();
this.dh = new DataManipulator(this);
this.dh.insert(myEditText1,myEditText2,myEditText3,myEditText4);
showDialog(DIALOG_ID);
break;
}
}
protected final Dialog onCreateDialog(final int id) {
Dialog dialog = null;
switch(id) {
case DIALOG_ID:
AlertDialog.Builder builder = new AlertDialog.Builder(this);
builder.setMessage("Information saved successfully ! Add Another Info?").setCancelable(false).setPositiveButton("No", new DialogInterface.OnClickListener() {
public void onClick(DialogInterface dialog, int id) {
SaveData.this.finish();
}
}).setNegativeButton("Yes", new DialogInterface.OnClickListener() {
public void onClick(DialogInterface dialog, int id) {
dialog.cancel();
}
});
AlertDialog alert = builder.create();
dialog = alert;
break;
default:
}
return dialog;
}
}
6.) Create a ListView to show the all data in a list in res/layout/check.xml :
<?xml version="1.0" encoding="utf-8"?>
<LinearLayout xmlns:android="http://schemas.android.com/apk/res/android"
android:orientation="vertical" android:layout_width="fill_parent" android:layout_height="fill_parent" >
<TextView android:id="@+id/selection2" android:layout_width="fill_parent" android:layout_height="wrap_content"
android:text="NAME – TELPHONE NO – SKYPE ID- ADDRESS" />
<TextView android:id="@+id/selection" android:layout_width="fill_parent" android:layout_height="wrap_content" />
<ListView android:id="@android:id/list" android:layout_width="fill_parent" android:layout_height="fill_parent" android:drawSelectorOnTop="false" android:textSize="3dip" />
</LinearLayout>
7.) Create a Activity CheckData.java :
package com.app.DatabaseSample;
import java.util.ArrayList;
import java.util.List;
import android.app.ListActivity;
import android.os.Bundle;
import android.view.View;
import android.widget.ArrayAdapter;
import android.widget.ListView;
import android.widget.TextView;
public class CheckData extends ListActivity {
TextView selection;
public int idToModify;
DataManipulator dm;
List<String[]> list = new ArrayList<String[]>();
List<String[]> names2 =null ;
String[] stg1;
protected void onCreate(Bundle savedInstanceState){
super.onCreate(savedInstanceState);
setContentView(R.layout.check);
dm = new DataManipulator(this);
names2 = dm.selectAll();
stg1=new String[names2.size()];
int x=0;
String stg;
for (String[] name : names2) {
stg = name[1]+" – "+name[2]+ " – "+name[3]+" – "+name[4];
stg1[x]=stg;
x++;
}
ArrayAdapter<String> adapter = new ArrayAdapter<String>(this,android.R.layout.simple_list_item_1,stg1);
this.setListAdapter(adapter);
selection=(TextView)findViewById(R.id.selection);
}
public void onListItemClick(ListView parent, View v, int position, long id) {
selection.setText(stg1[position]);
}
}
9.) Run the Application.
Steps to Create:1.) Open Eclipse. Use the New Project Wizard and select Android Project Give the respective project name i.e. DatabaseSample. Enter following information:
Project name: DatabaseSample
Build Target: Android 2.1
Application name: DatabaseSample
Package name: com.app.DatabaseSample
Create Activity: DatabaseSample

On Clicking Finish DatabaseSample code structure is generated with the necessary Android Packages being imported along with DatabaseSample.java. DatabaseSample class will look like following :
package com.app.DatabaseSample;
import android.app.Activity;
import android.content.Intent;
import android.os.Bundle;
import android.view.View;
import android.view.View.OnClickListener;
public class DatabaseSample extends Activity implements OnClickListener {
/** Called when the activity is first created. */
@Override
public void onCreate(Bundle savedInstanceState) {
super.onCreate(savedInstanceState);
setContentView(R.layout.main);
View button1Click = findViewById(R.id.button1);
button1Click.setOnClickListener(this);
View button2Click = findViewById(R.id.button2);
button2Click.setOnClickListener(this);
}
@Override
public void onClick(View v) {
// TODO Auto-generated method stub
switch(v.getId()){
case R.id.button1:
Intent i = new Intent(this, SaveData.class);
startActivity(i);
break;
case R.id.button2:
Intent i1 = new Intent(this, CheckData.class);
startActivity(i1);
break;
}
}
}
android manifest
<?xml version="1.0" encoding="utf-8" ?>
<manifest xmlns:android="http://schemas.android.com/apk/res/android" package="com.app.DatabaseSample" android:versionCode="1" android:versionName="1.0">
<uses-sdk android:minSdkVersion="7" />
<application android:icon="@drawable/icon" android:label="@string/app_name">
<activity android:name=".DatabaseSample" android:label="@string/app_name">
<intent-filter>
<action android:name="android.intent.action.MAIN" />
<category android:name="android.intent.category.LAUNCHER" />
</intent-filter>
</activity>
<activity android:name=".SaveData" android:label="@string/app_name" />
<activity android:name=".CheckData" android:label="@string/app_name" />
</application>
</manifest>Output


Basic description of algorithm in step by step form:
1.) Create a Project DatabaseSample.
2.) Replace the following code with res/layout/main.xml :
<?xml version="1.0" encoding="utf-8"?>
<RelativeLayout android:layout_width="fill_parent" android:layout_height="fill_parent" xmlns:android="http://schemas.android.com/apk/res/android" >
<TextView android:id="@+id/text" android:layout_height="wrap_content" android:layout_width="wrap_content" android:text="DataBase Sample App" android:textSize="24.5sp" android:layout_gravity="center"/>
<Button android:layout_below="@id/text" android:text="Save Data" android:id="@+id/button1" android:layout_gravity="center" android:layout_width="wrap_content" android:layout_height="wrap_content" android:layout_marginLeft="50dp" android:layout_marginTop="50dp">
</Button>
<Button android:layout_below="@id/button1" android:text="Check Data" android:id="@+id/button2" android:layout_gravity="center" android:layout_width="wrap_content" android:layout_height="wrap_content" android:layout_marginLeft="50dp">
</Button>
</RelativeLayout>
3.) Create a helper class DataManipulator.java that can create the database and encapsulate other SQL details. In this DataManipulator class we will include an important inner class OpenHelper that provides a SQLiteOpenHelper.
package com.app.DatabaseSample;
import android.content.Context;
import android.database.Cursor;
import android.database.sqlite.SQLiteDatabase;
import android.database.sqlite.SQLiteOpenHelper;
import android.database.sqlite.SQLiteStatement;
import java.util.ArrayList;
import java.util.List;
public class DataManipulator
{
private static final String DATABASE_NAME = "mydatabase.db";
private static final int DATABASE_VERSION = 1;
static final String TABLE_NAME = "newtable";
private static Context context;
static SQLiteDatabase db;
private SQLiteStatement insertStmt;
private static final String INSERT = "insert into " + TABLE_NAME + " (name,number,skypeId,address) values (?,?,?,?)";
public DataManipulator(Context context) {
DataManipulator.context = context;
OpenHelper openHelper = new OpenHelper(DataManipulator.context);
DataManipulator.db = openHelper.getWritableDatabase();
this.insertStmt = DataManipulator.db.compileStatement(INSERT);
}
public long insert(String name,String number,String skypeId,String address) {
this.insertStmt.bindString(1, name);
this.insertStmt.bindString(2, number);
this.insertStmt.bindString(3, skypeId);
this.insertStmt.bindString(4, address);
return this.insertStmt.executeInsert();
}
public void deleteAll() {
db.delete(TABLE_NAME, null, null);
}
public List<String[]> selectAll()
{
List<String[]> list = new ArrayList<String[]>();
Cursor cursor = db.query(TABLE_NAME, new String[] { "id","name","number","skypeId","address" }, null, null, null, null, "name asc");
int x=0;
if (cursor.moveToFirst()) {
do {
String[] b1=new String[]{cursor.getString(0),cursor.getString(1),cursor.getString(2),
cursor.getString(3),cursor.getString(4)};
list.add(b1);
x=x+1;
} while (cursor.moveToNext());
}
if (cursor != null && !cursor.isClosed()) {
cursor.close();
}
cursor.close();
return list;
}
public void delete(int rowId) {
db.delete(TABLE_NAME, null, null);
}
private static class OpenHelper extends SQLiteOpenHelper {
OpenHelper(Context context) {
super(context, DATABASE_NAME, null, DATABASE_VERSION);
}
@Override
public void onCreate(SQLiteDatabase db) {
db.execSQL("CREATE TABLE " + TABLE_NAME + " (id INTEGER PRIMARY KEY, name TEXT, number TEXT, skypeId TEXT, address TEXT)");
}
@Override
public void onUpgrade(SQLiteDatabase db, int oldVersion, int newVersion)
{
db.execSQL("DROP TABLE IF EXISTS " + TABLE_NAME);
onCreate(db);
}
}
}
4.) Create a save.xml in res/layout/save.xml:
<?xml version="1.0" encoding="UTF-8"?>
<LinearLayout xmlns:android="http://schemas.android.com/apk/res/android" android:id="@+id/LinearLayout01" android:orientation="vertical" android:layout_width="wrap_content" android:layout_height="wrap_content" android:paddingLeft="20sp">
<TextView android:id="@+id/button1_label" android:layout_height="fill_parent" android:layout_width="wrap_content" android:text="Fill Information" android:textSize="24.5sp" android:layout_gravity="center" android:layout_marginBottom="25dip" />
<TextView android:layout_width="fill_parent" android:layout_height="wrap_content" android:text="Name:" android:layout_gravity="center" android:textSize="14.5sp" />
<EditText android:id="@+id/name" android:layout_width="fill_parent" android:layout_height="wrap_content" />
<TextView android:layout_width="fill_parent" android:layout_height="wrap_content" android:text="Telephone Number:" android:layout_gravity="center" android:textSize="14.5sp" />
<EditText android:id="@+id/number" android:layout_width="fill_parent" android:layout_height="wrap_content" />
<TextView android:layout_width="fill_parent" android:layout_height="wrap_content" android:text="Skype ID:" android:layout_gravity="center" android:textSize="14.5sp" />
<EditText android:id="@+id/skypeId" android:layout_width="fill_parent" android:layout_height="wrap_content" />
<TextView android:layout_width="fill_parent" android:layout_height="wrap_content" android:text="Address:" android:layout_gravity="center" android:textSize="14.5sp" />
<EditText android:id="@+id/address" android:layout_width="fill_parent" android:layout_height="wrap_content" />
<LinearLayout android:id="@+id/LinearLayout02" android:orientation="horizontal" android:layout_width="wrap_content" android:layout_height="wrap_content" android:paddingLeft="20sp">
<Button android:text="Save" android:id="@+id/Button01add" android:layout_width="wrap_content" android:layout_height="wrap_content" android:layout_marginTop="20sp" android:layout_marginLeft="20sp">
</Button>
<Button android:text="Back" android:id="@+id/Button01home" android:layout_width="wrap_content" android:layout_height="wrap_content" android:layout_marginTop="20sp" android:layout_marginLeft="20sp">
</Button>
</LinearLayout>
</LinearLayout>
5.) Create a Activity SaveData.java to Save the information :
package com.app.DatabaseSample;
import android.app.Activity;
import android.view.View;
import android.view.View.OnClickListener;
import android.app.AlertDialog;
import android.app.Dialog;
import android.content.DialogInterface;
import android.content.Intent;
import android.os.Bundle;
import android.widget.EditText;
import android.widget.TextView;
public class SaveData extends Activity implements OnClickListener {
private DataManipulator dh;
static final int DIALOG_ID = 0;
protected void onCreate(Bundle savedInstanceState){
super.onCreate(savedInstanceState);
setContentView(R.layout.save);
View add = findViewById(R.id.Button01add);
add.setOnClickListener(this);
View home = findViewById(R.id.Button01home);
home.setOnClickListener(this);
}
public void onClick(View v){
switch(v.getId()){
case R.id.Button01home:
Intent i = new Intent(this, DatabaseSample.class);
startActivity(i);
break;
case R.id.Button01add:
View editText1 = (EditText) findViewById(R.id.name);
View editText2 = (EditText) findViewById(R.id.number);
View editText3 = (EditText) findViewById(R.id.skypeId);
View editText4 = (EditText) findViewById(R.id.address);
String myEditText1=((TextView) editText1).getText().toString();
String myEditText2=((TextView) editText2).getText().toString();
String myEditText3=((TextView) editText3).getText().toString();
String myEditText4=((TextView) editText4).getText().toString();
this.dh = new DataManipulator(this);
this.dh.insert(myEditText1,myEditText2,myEditText3,myEditText4);
showDialog(DIALOG_ID);
break;
}
}
protected final Dialog onCreateDialog(final int id) {
Dialog dialog = null;
switch(id) {
case DIALOG_ID:
AlertDialog.Builder builder = new AlertDialog.Builder(this);
builder.setMessage("Information saved successfully ! Add Another Info?").setCancelable(false).setPositiveButton("No", new DialogInterface.OnClickListener() {
public void onClick(DialogInterface dialog, int id) {
SaveData.this.finish();
}
}).setNegativeButton("Yes", new DialogInterface.OnClickListener() {
public void onClick(DialogInterface dialog, int id) {
dialog.cancel();
}
});
AlertDialog alert = builder.create();
dialog = alert;
break;
default:
}
return dialog;
}
}
6.) Create a ListView to show the all data in a list in res/layout/check.xml :
<?xml version="1.0" encoding="utf-8"?>
<LinearLayout xmlns:android="http://schemas.android.com/apk/res/android"
android:orientation="vertical" android:layout_width="fill_parent" android:layout_height="fill_parent" >
<TextView android:id="@+id/selection2" android:layout_width="fill_parent" android:layout_height="wrap_content"
android:text="NAME – TELPHONE NO – SKYPE ID- ADDRESS" />
<TextView android:id="@+id/selection" android:layout_width="fill_parent" android:layout_height="wrap_content" />
<ListView android:id="@android:id/list" android:layout_width="fill_parent" android:layout_height="fill_parent" android:drawSelectorOnTop="false" android:textSize="3dip" />
</LinearLayout>
7.) Create a Activity CheckData.java :
package com.app.DatabaseSample;
import java.util.ArrayList;
import java.util.List;
import android.app.ListActivity;
import android.os.Bundle;
import android.view.View;
import android.widget.ArrayAdapter;
import android.widget.ListView;
import android.widget.TextView;
public class CheckData extends ListActivity {
TextView selection;
public int idToModify;
DataManipulator dm;
List<String[]> list = new ArrayList<String[]>();
List<String[]> names2 =null ;
String[] stg1;
protected void onCreate(Bundle savedInstanceState){
super.onCreate(savedInstanceState);
setContentView(R.layout.check);
dm = new DataManipulator(this);
names2 = dm.selectAll();
stg1=new String[names2.size()];
int x=0;
String stg;
for (String[] name : names2) {
stg = name[1]+" – "+name[2]+ " – "+name[3]+" – "+name[4];
stg1[x]=stg;
x++;
}
ArrayAdapter<String> adapter = new ArrayAdapter<String>(this,android.R.layout.simple_list_item_1,stg1);
this.setListAdapter(adapter);
selection=(TextView)findViewById(R.id.selection);
}
public void onListItemClick(ListView parent, View v, int position, long id) {
selection.setText(stg1[position]);
}
}
9.) Run the Application.
Project name: DatabaseSample
Build Target: Android 2.1
Application name: DatabaseSample
Package name: com.app.DatabaseSample
Create Activity: DatabaseSample
package com.app.DatabaseSample;
import android.app.Activity;
import android.content.Intent;
import android.os.Bundle;
import android.view.View;
import android.view.View.OnClickListener;
public class DatabaseSample extends Activity implements OnClickListener {
/** Called when the activity is first created. */
@Override
public void onCreate(Bundle savedInstanceState) {
super.onCreate(savedInstanceState);
setContentView(R.layout.main);
View button1Click = findViewById(R.id.button1);
button1Click.setOnClickListener(this);
View button2Click = findViewById(R.id.button2);
button2Click.setOnClickListener(this);
}
@Override
public void onClick(View v) {
// TODO Auto-generated method stub
switch(v.getId()){
case R.id.button1:
Intent i = new Intent(this, SaveData.class);
startActivity(i);
break;
case R.id.button2:
Intent i1 = new Intent(this, CheckData.class);
startActivity(i1);
break;
}
}
}
android manifest
<?xml version="1.0" encoding="utf-8" ?>
<manifest xmlns:android="http://schemas.android.com/apk/res/android" package="com.app.DatabaseSample" android:versionCode="1" android:versionName="1.0">
<uses-sdk android:minSdkVersion="7" />
<application android:icon="@drawable/icon" android:label="@string/app_name">
<activity android:name=".DatabaseSample" android:label="@string/app_name">
<intent-filter>
<action android:name="android.intent.action.MAIN" />
<category android:name="android.intent.category.LAUNCHER" />
</intent-filter>
</activity>
<activity android:name=".SaveData" android:label="@string/app_name" />
<activity android:name=".CheckData" android:label="@string/app_name" />
</application>
</manifest>Output
Android Textview Aligment
Here we are going to see about how to set textview alignment in Android.
It is very simple to set Android textview alignment to the center, right or left etc..
Example for Android textview alignment -
To align a textview we need to use the 'gravity' property
[sourcecode language="xml"]
<TextView android:text="@+id/TextView01"
android:id="@+id/TextView01"
android:layout_height="wrap_content"
android:layout_width="fill_parent"
android:gravity="center" />
[/sourcecode]
Now we set the alignment to center so that textview text will appear in the center of the textview(see the below image).

We can set the gravity as top, right, left, bottom,etc...you can also set more than one gravity at a time.
For instance,
android:gravity="right|center"
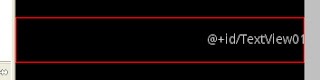
Note: (The red color lines won’t appear in the output.)
It is very simple to set Android textview alignment to the center, right or left etc..
Example for Android textview alignment -
To align a textview we need to use the 'gravity' property
[sourcecode language="xml"]
<TextView android:text="@+id/TextView01"
android:id="@+id/TextView01"
android:layout_height="wrap_content"
android:layout_width="fill_parent"
android:gravity="center" />
[/sourcecode]
Now we set the alignment to center so that textview text will appear in the center of the textview(see the below image).
We can set the gravity as top, right, left, bottom,etc...you can also set more than one gravity at a time.
For instance,
android:gravity="right|center"

Note: (The red color lines won’t appear in the output.)
Android check SD card availability from code
Android check SD card availability from code
There is an easy way of finding the availability of SD in phone just by calling a method.
This method return true when there is a SD card (external storage) available to store data in it.
Where can we use this function?
1. We can check the availability before writing a file into storage.
2.If you want an alternative to cache or download directory we can check the availability of SD card and use them.
The function is
[sourcecode language="java"]
public static boolean isSdPresent() {
return android.os.Environment.getExternalStorageState().equals(
android.os.Environment.MEDIA_MOUNTED);
}
[/sourcecode]
return type boolean(true->available,false->NA).
Android Gallery ImageView Example
Now we are going to see a simple gallery example of how to use gallery look like a photo album as like in our phone. That is, when we click the item in gallery, the corresponding image will display below in full size using imageview.
Create a attrs.xml file in res/values folder. This file is used to declare the style. ( Code in previous post - simple gallery example).
Main.xml
Create a attrs.xml file in res/values folder. This file is used to declare the style. ( Code in previous post - simple gallery example).
Main.xml
<?xml version="1.0" encoding="utf-8"?>
<LinearLayout android:id="@+id/LinearLayout01"
 android:layout_width="fill_parent" android:layout_height="fill_parent"
 xmlns:android="http://schemas.android.com/apk/res/android"
 android:orientation="vertical">
 <Gallery xmlns:android="http://schemas.android.com/apk/res/android"
  android:id="@+id/examplegallery" android:layout_width="fill_parent"
  android:layout_height="wrap_content" />
 <ImageView android:id="@+id/ImageView01"
  android:layout_width="wrap_content" android:layout_height="wrap_content"/>
</LinearLayout>
Java file
public class GalleryExample extends Activity {
    private Gallery gallery;
    private ImageView imgView;
private Integer[] Imgid = {
            R.drawable.a_1, R.drawable.a_2, R.drawable.a_3, R.drawable.a_4, R.drawable.a_5, R.drawable.a_6, R.drawable.a_7
    };
@Override
    public void onCreate(Bundle savedInstanceState) {
        super.onCreate(savedInstanceState);
        setContentView(R.layout.main);
imgView = (ImageView)findViewById(R.id.ImageView01);
        imgView.setImageResource(Imgid[0]);
gallery = (Gallery) findViewById(R.id.examplegallery);
         gallery.setAdapter(new AddImgAdp(this));
gallery.setOnItemClickListener(new OnItemClickListener() {
            public void onItemClick(AdapterView parent, View v, int position, long id) {
                imgView.setImageResource(Imgid[position]);
            }
        });
}
public class AddImgAdp extends BaseAdapter {
        int GalItemBg;
        private Context cont;
public AddImgAdp(Context c) {
            cont = c;
            TypedArray typArray = obtainStyledAttributes(R.styleable.GalleryTheme);
            GalItemBg = typArray.getResourceId(R.styleable.GalleryTheme_android_galleryItemBackground, 0);
            typArray.recycle();
        }
public int getCount() {
            return Imgid.length;
        }
public Object getItem(int position) {
            return position;
        }
public long getItemId(int position) {
            return position;
        }
public View getView(int position, View convertView, ViewGroup parent) {
            ImageView imgView = new ImageView(cont);
imgView.setImageResource(Imgid[position]);
            imgView.setLayoutParams(new Gallery.LayoutParams(80, 70));
            imgView.setScaleType(ImageView.ScaleType.FIT_XY);
            imgView.setBackgroundResource(GalItemBg);
return imgView;
        }
    }}


Subscribe to:
Posts (Atom)